一 什么是Spring Cloud Gateway
Spring Cloud Gateway旨在提供一种简单而有效的方法来路由到具体服务的API,除此之外,还支持安全性、监视/指标和弹性等领域的配置。
工作原理如图:
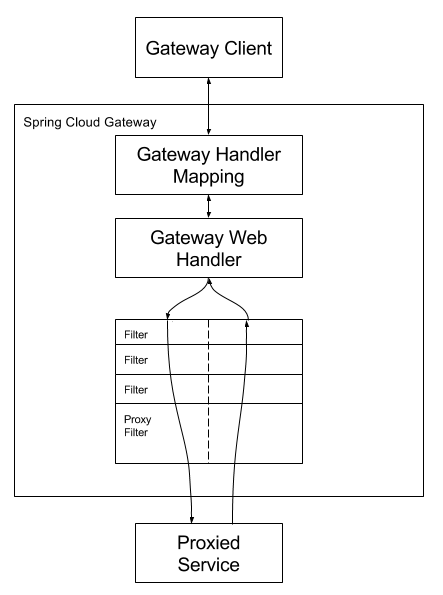
客户端向Spring Cloud Gateway发出请求。如果Gateway Handler Mapping确定请求与路由匹配,则将其发送到Gateway Web Handler。该处理器通过特定于请求的过滤器链运行请求。过滤器由虚线分隔的原因是,过滤器可以在发送代理请求之前和之后执行逻辑。所有“前置”过滤器逻辑均被执行,然后发出代理请求,发出代理请求后,将运行“后”过滤器逻辑。
二 Spring Cloud Gateway特性
- 基于Spring Framework 5,Project Reactor和Spring Boot 2.0构建
- 能够匹配任何请求属性上的路由。
- Predicates和过滤器可以针对特定路由配置,并且便于根据需要自定义。
- 集成了Hystrix,支持Hystrix熔断降级。
- 集成了Spring Cloud DiscoveryClient,可以自动发现服务。
- 支持限流,也可以自定义限流过滤器以满足自己的项目需要。
- 可以根据需要改写路由,即暴露的路由与服务的路由做转换映射。
三 生成spring boot项目
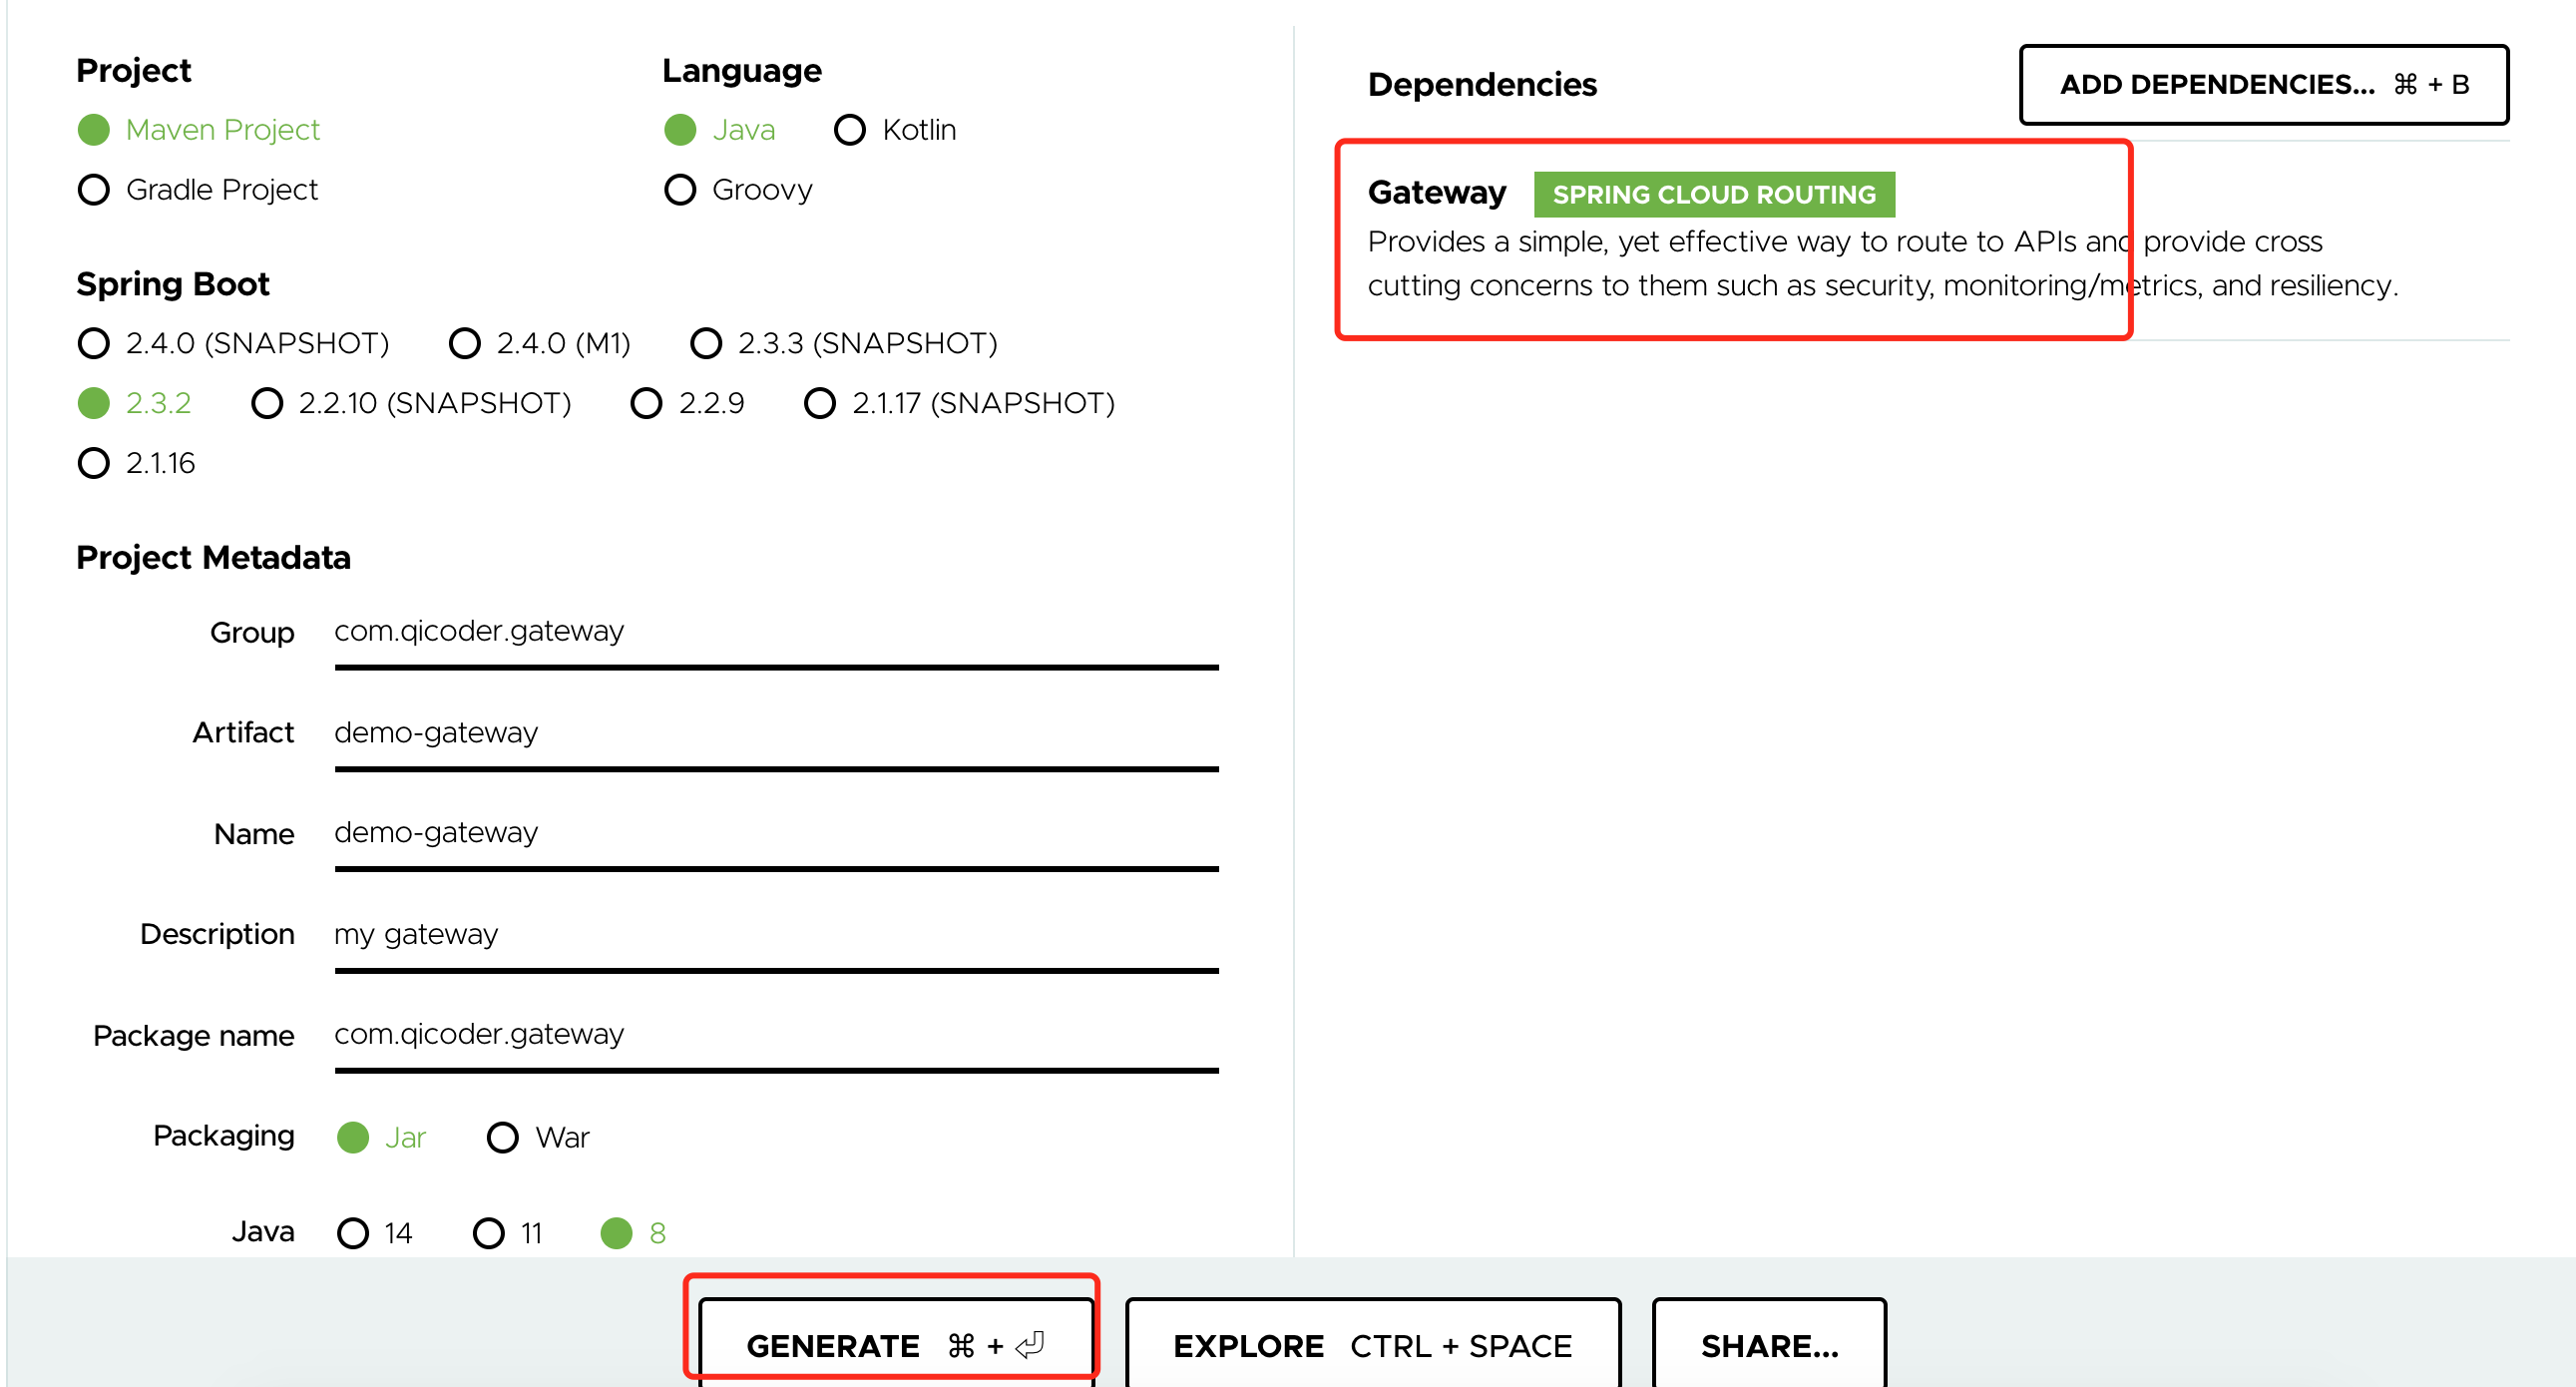
到 https://start.spring.io/ 生成含spring cloud gateway的maven项目,如下图
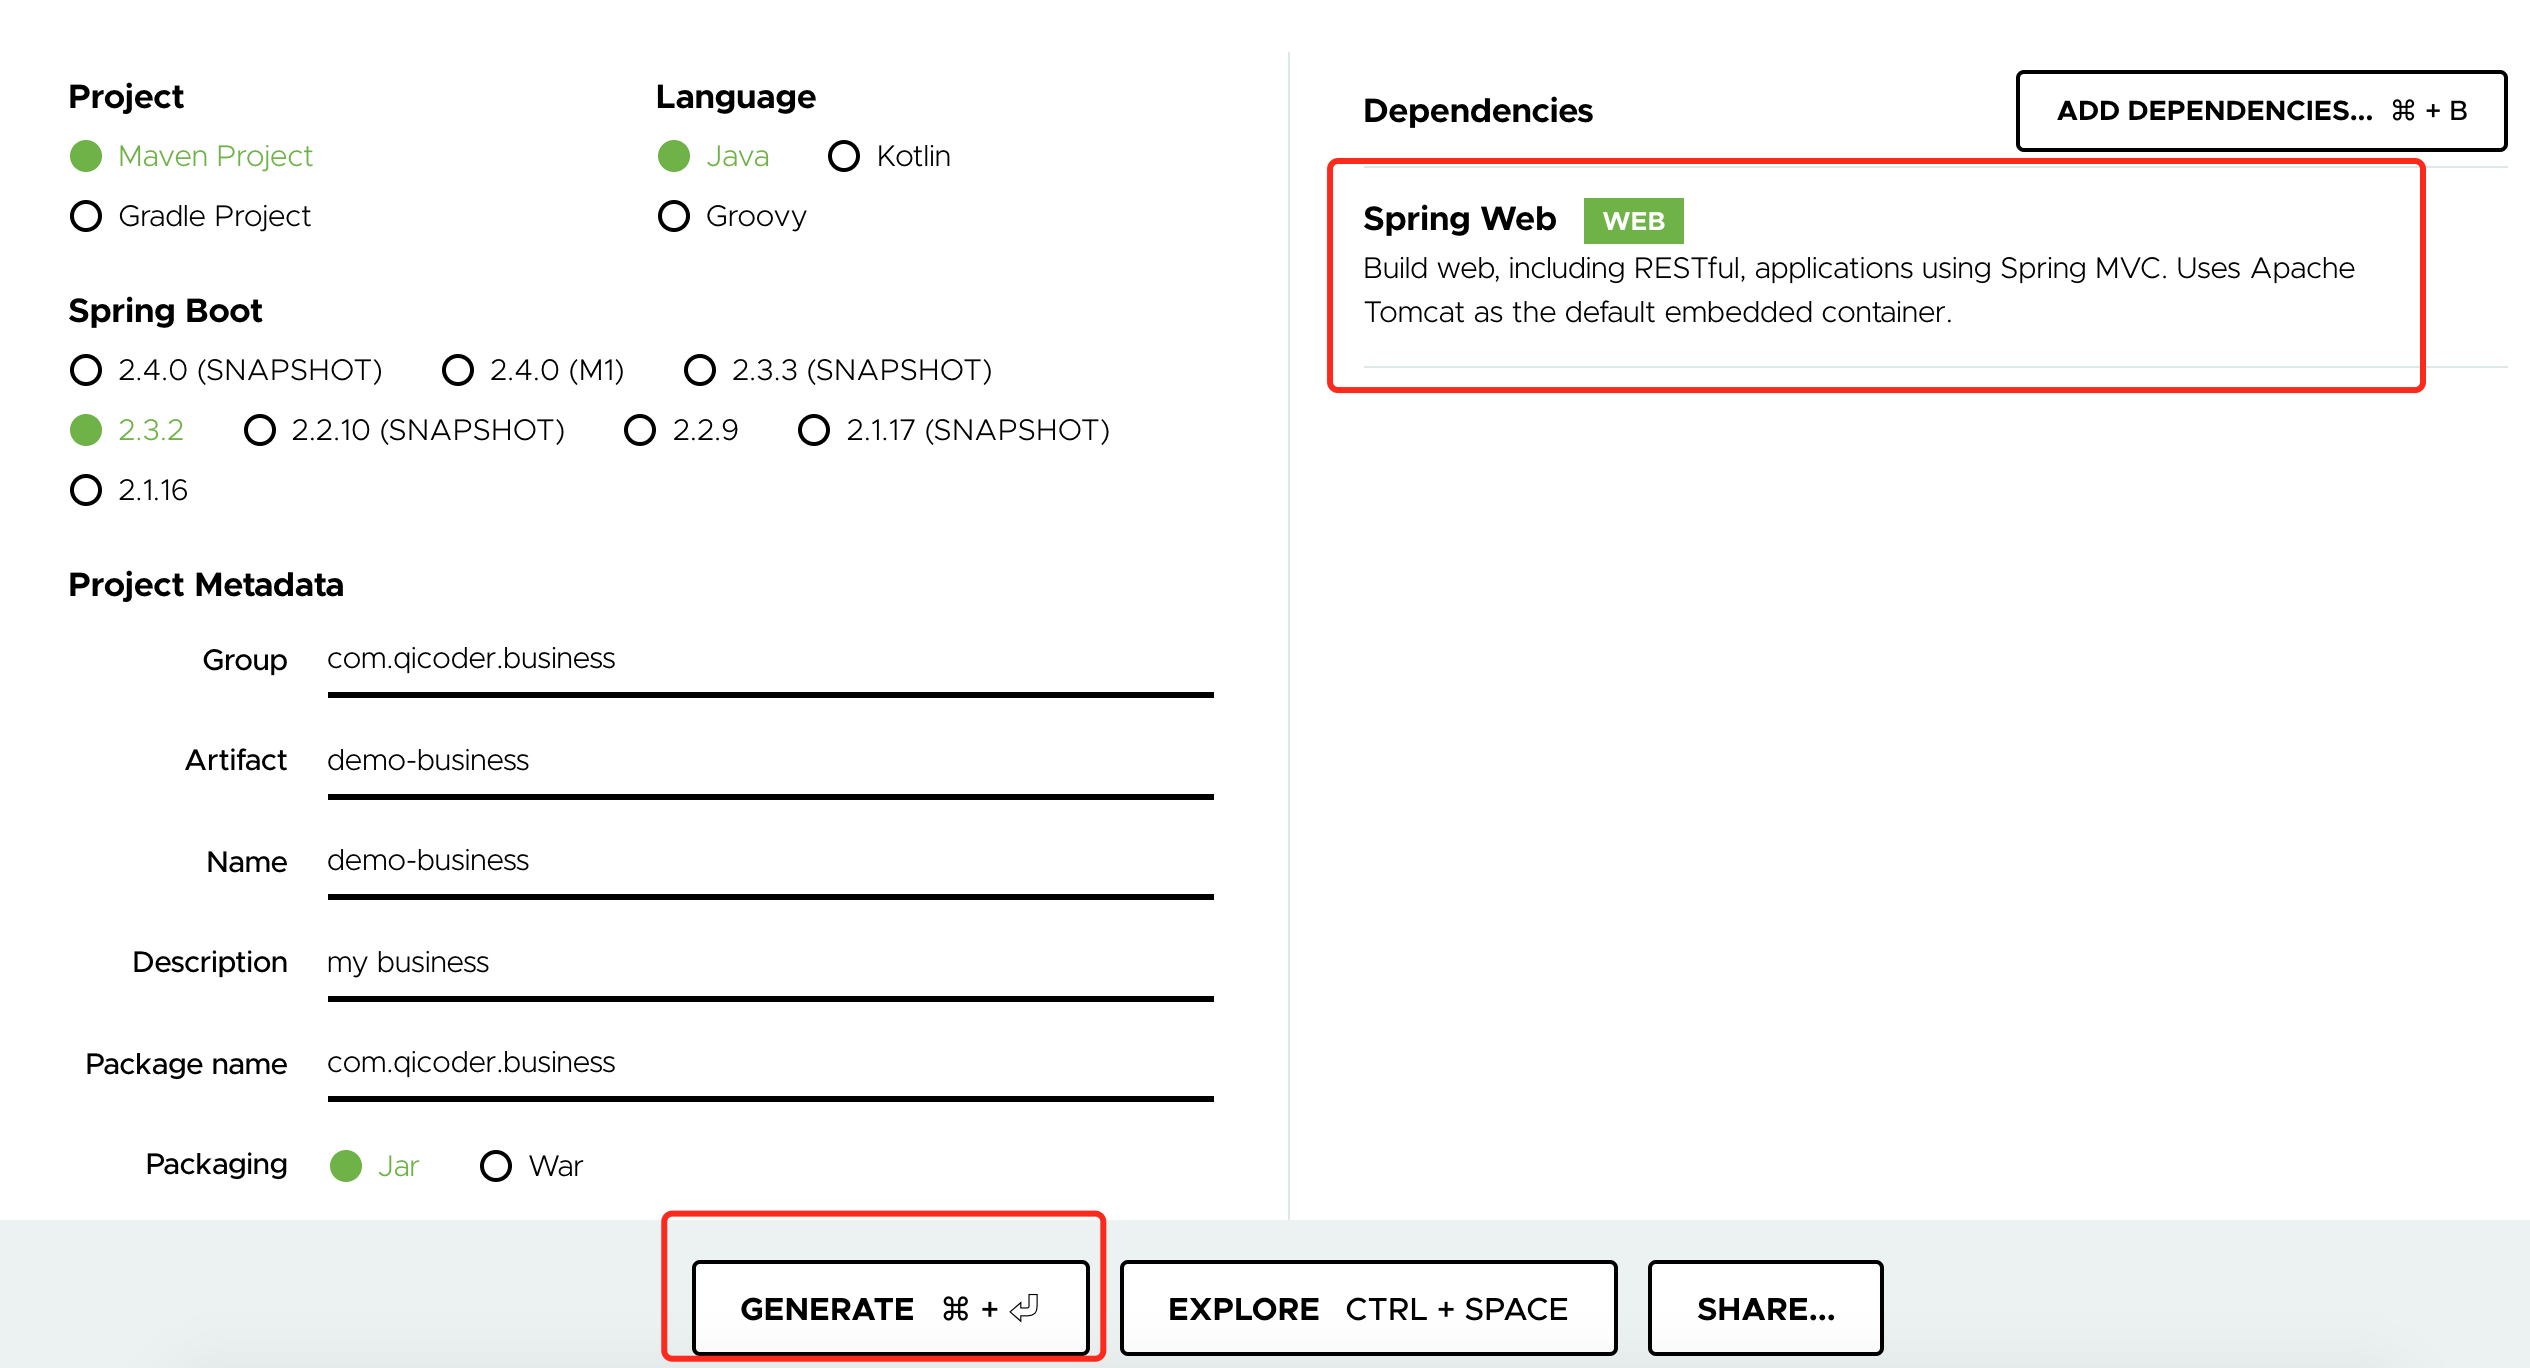
同时生成一个业务服务如下:
四 修改生成的项目
针对demo-gateway项目
删除resources下的application.properties,创建application.yaml,并粘贴以下配置
1
2
3
4
5
6
7
8
9
10
11
12
13
14
15
16
17
server:
port: 8888
spring:
application:
name: demo-gateway
cloud:
gateway:
routes:
# 某业务服务
- id: demo-business
uri: http://localhost:9999
predicates:
- Path=/business/**
filters:
- RewritePath=/business(?<segment>.*), /api$\{segment}
针对demo-business项目
application.properties增加配置
1
server.port=9999
在包
com.qicoder.business下增加controller包,并在该controller包下创建一个controller如下:1
2
3
4
5
6
7
8
9
10
11
12
13
14
15
16
17
18
19
20
21
22
23
24package com.qicoder.business.controller;
import org.springframework.web.bind.annotation.GetMapping;
import org.springframework.web.bind.annotation.RequestMapping;
import org.springframework.web.bind.annotation.RestController;
/**
* business demo
*/
("/api")
public class MyBusinessController {
("/test1")
public String testApi() {
return "test 11111";
}
("/test2")
public String testApi2() {
return "test 2222";
}
}
五 验证
分别启动两个服务的application
在浏览器浏览业务服务接口地址,看返回情况如下:
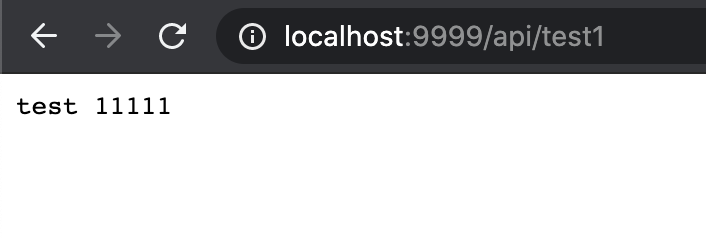
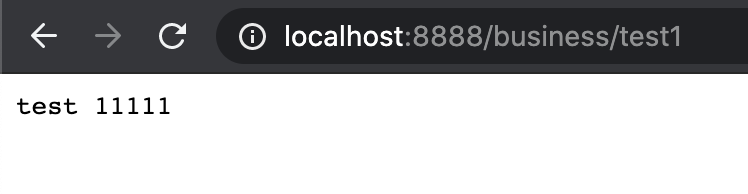
通过上面两个图片情况可知,网关转发生效了,至此,恭喜你,你的最基础的一个网关服务已经完成了。